Exporting your final video in Final Cut Pro isn't complicated, but the number of choices available can sometimes slow you down if you’re not familiar with what each one does. You might just want to save a basic copy of your video or share it straight to a platform like YouTube, or maybe you need a high-quality master file. The good thing is that Final Cut Pro covers all of that without needing any third-party plugins. Here's a look at the different export methods, each explained clearly so you know exactly what to use and when.
How to Export Video from Final Cut Pro: All the Ways You Need to Know
1. Export Using “Master File” (Default)
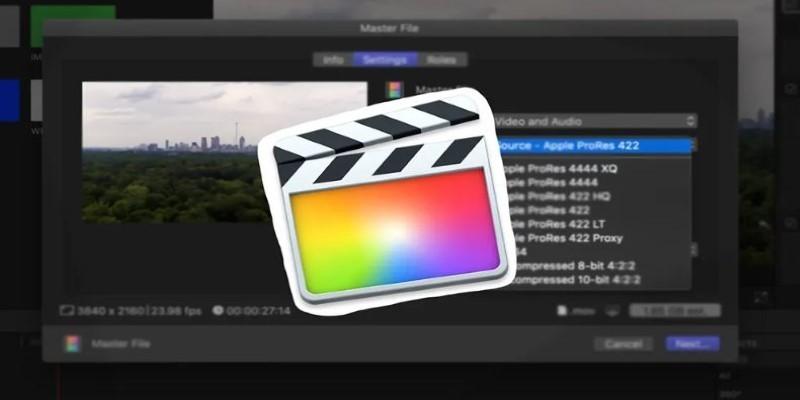
This is the main option most users rely on when finishing a project. Choosing “Master File” gives you complete control over the format, codec, resolution, and audio settings. It’s not compressed for streaming—so the quality stays intact.
Once your timeline is ready, head to File > Share > Master File (default). A window opens with tabs like “Info” and “Settings.” In the Settings tab, you can pick:
- Format: Video and Audio, or just one of them
- Video Codec: H.264 (smaller file), ProRes 422 (higher quality), ProRes 4444 (even higher with alpha support)
- Resolution: Keep as original or downscale
- Audio: Choose AAC for general use or Linear PCM for broadcast
This method is ideal when you want a high-quality archive, send it to clients, or import it into other software for final touches.
2. Export Directly to YouTube or Vimeo
If you want to upload your video without going through extra steps, Final Cut lets you publish directly to platforms like YouTube and Vimeo.
Choose File > Share > YouTube & Facebook. Don’t worry about the label—this covers YouTube, Facebook, and Vimeo.
You'll be prompted to log into your account the first time. After that, set your video title, description, category, and resolution. Final Cut will compress the video to match the platform's preferred specs (usually H.264 in an MP4 container) and then upload it for you.
It’s fast and doesn’t require leaving the software. The downside? You give up fine control over compression settings.
3. Export Using Apple Devices Setting
There’s also a streamlined option for exporting videos meant to play on iPhones, iPads, Apple TVs, and Macs.
From the Share menu, pick Apple Devices 1080p or 4K, depending on your timeline resolution. This uses H.264 encoding and wraps the file in a .m4v container, ready to sync through iTunes or AirDrop.
It’s helpful when sharing videos for offline viewing on Apple hardware. File sizes are smaller, playback is smooth, and the video still looks good.
4. Export as a Compressor Preset (if you have a Compressor installed)
For those using Apple Compressor, Final Cut Pro integrates seamlessly. You can create custom Compressor presets with specific bitrate, resolution, audio, and even watermark settings.
After creating your preset in Compressor, go to File > Share > Add Destination and drag it into a "Compressor Settings" item. Assign your custom preset to it.
Now, you can export straight from Final Cut using your personalized settings without manually opening Compressor. This option is best when you have recurring projects with identical delivery specs.
5. Export Individual Stems Using Roles
When your project includes multiple types of content—dialogue, effects, music—you might need separate audio stems for each category. That’s where Roles come in.
Assign roles to clips (e.g., Dialogue, Music, Effects), then go to File > Share > Master File, open Settings, and choose Roles as Separate Files.
Final Cut then exports different audio tracks for each role, all tied to your video. This is helpful when handing off to a sound mixer or preparing a broadcast-ready file.
It can also separate video and audio in case they need to be treated independently.
6. Export as Image Sequence
For certain animations, frame-by-frame grading, or visual effects, exporting as an image sequence might be necessary.
From the Share menu, click “Add Destination,” then drag “Export File” into the list. Under the Settings tab, pick Format: Image Sequence, and choose either TIFF, PNG, or DPX.
Each frame of your timeline becomes an individual still image. You’ll need separate software to reassemble it into a video, but this is standard in some professional workflows, especially for VFX.
7. Export Using XML
While not technically a "video export," exporting an XML file is essential when you’re collaborating with editors or moving your project into DaVinci Resolve or Adobe Premiere.
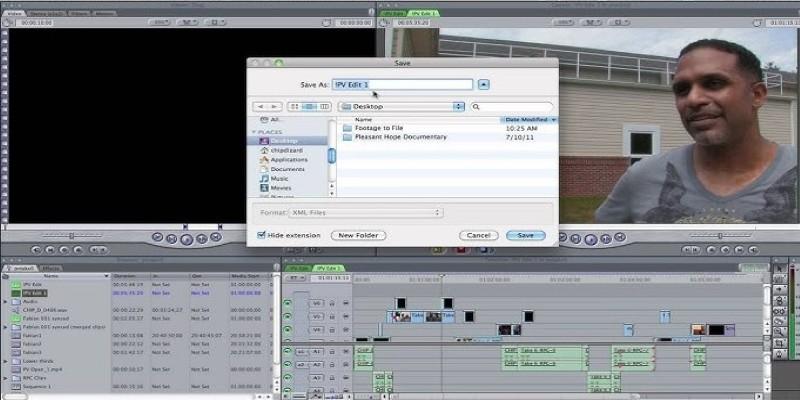
To export, go to File > Export XML. You’ll get a .fcpxml file that includes all project data, including edits, effects, and metadata—but no media. It’s a roadmap, not a movie.
It’s only useful if your next step is editing or finishing elsewhere, but it’s important enough to be on this list.
8. Export for DVD or Blu-ray
Though not as common today, you can still create physical discs using Final Cut’s built-in DVD export. Choose File > Share > DVD and select your layout, background image, and button style.
Final Cut will encode the video as MPEG-2 and burn it directly to a disc or create a disc image (.img) for burning later.
Blu-ray is supported, too, though you'll need an external Blu-ray burner. It's handy for events or personal projects that benefit from a physical copy.
Final Thoughts
Exporting in Final Cut Pro comes down to what you plan to do with your video. Whether you want high-quality, small-size, quick upload, or segmented audio—there’s a direct way to do it. Once you understand what each method offers, you’ll save time and avoid unnecessary file conversions. Each option serves a clear purpose. You don’t need all of them for every project, but knowing they’re there gives you the flexibility to deliver exactly what’s needed.